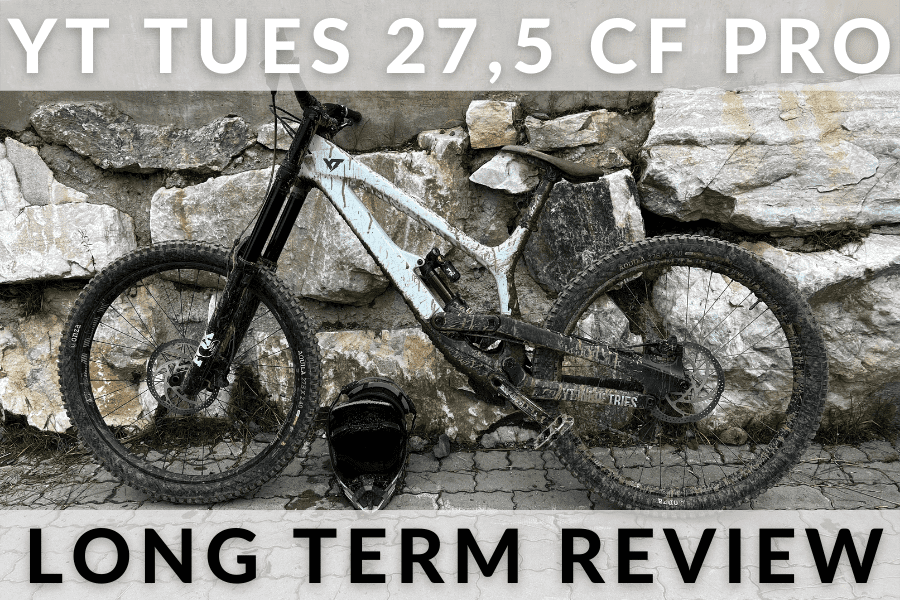
Over the past couple of seasons, I rode my 2019 YT Tues CF Pro on all kinds of terrain from full-on world cup downhill tracks (Schladming and Leogang), to natural singletracks, to hard-packed jump-lines, and even on the odd flow-line. After all those vertical miles on the bike, it’s time to share my experiences.
This article is about my long-term experiences with the YT Tues 27 CF Pro from model year 2019 in particular. Since 2018 the yearly Tues models have used the same frames and only been updated slightly (frame colors and individual parts), but there have been no updates to the actual frame itself.
In this context, the experiences detailed here still have relevance in 2022.
Pro
- Price to performance
- Specs and parts
- Lightweight
- Feels extremely planted
- Acceleration
- Sturdy build
- Looks & design (personal bias)
Contra
- Handlebar width too wide for most people
- TRP Quadiem brakes too weak for DH
- Rims get dinged up relatively easy
- Cassette and hub is one single part
- Headset notoriously short lifespan
The YT Tues is a predictable and dependable downhill bike you quickly get confident on. When tracks get steep, rough, or fast it provides predictable traction and comfort. While it is comparatively lightweight and reasonably priced, the durability combined with the reliability over many seasons in the bike park is what’s most impressive.

Why I chose the YT Tues
As you may know, YT Industries is an online direct-to-consumer company, meaning they don’t deliver to or sell in retail stores. By eliminating these steps in their supply chain and their respective mark-ups, they are able to offer complete high-end mountain bikes for considerably less compared to direct competitors without cutting corners on the production side. This in turn means you as the potential customer won’t have the option for a test ride or discuss it with your trusted local bike shop.
This was a major concern for me. Mountainbikes (especially carbon ones) are not exactly cheap, so doing that leap of faith was not something I was ready for initially. Reading and watching through all the info out there, I still had no idea how it might feel for me and if it suited my riding style. Among all the praise I heard it felt dead (too planted) and stiff (as in too hard). Both of which don’t particularly sound exciting.
With so many YT bikes around in parks these days, I one day managed to grab one for a single lap down a track I rode down all day and was familiar with. It was a 2017 model and at Medium a size too small for me. Rolling around in the parking lot felt totally awkward honestly. But, it took only the first couple of vertical meters on the track to get a feel for the geometry, brakes, tires, and suspension. After that, it was insane how fast I felt extremely comfortable on a bike that was nothing like I had ridden before but inspired pure confidence from the word go. I was sold.
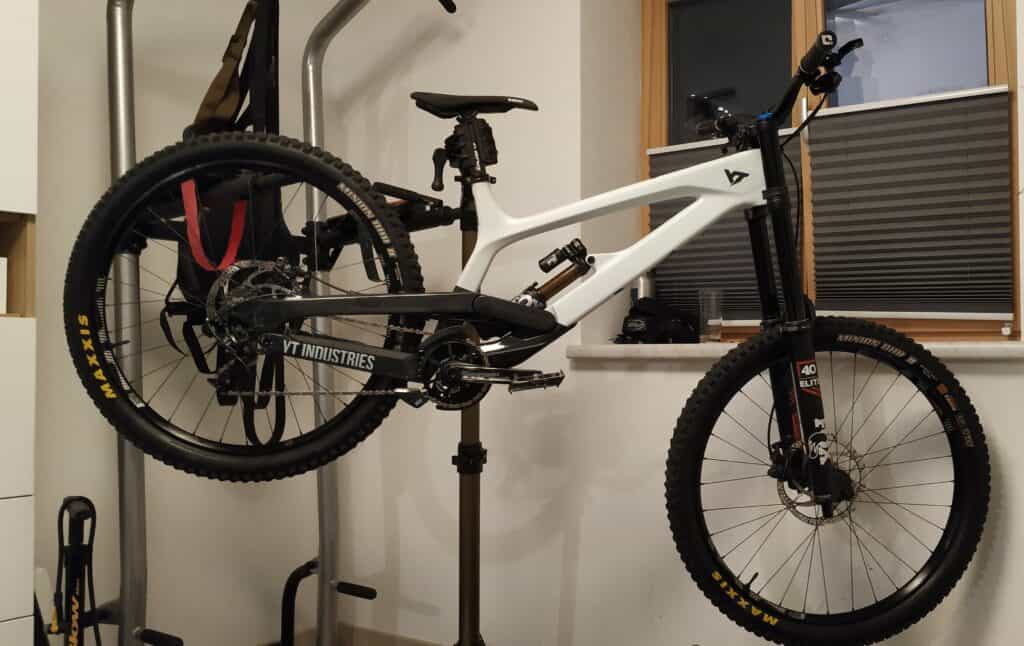
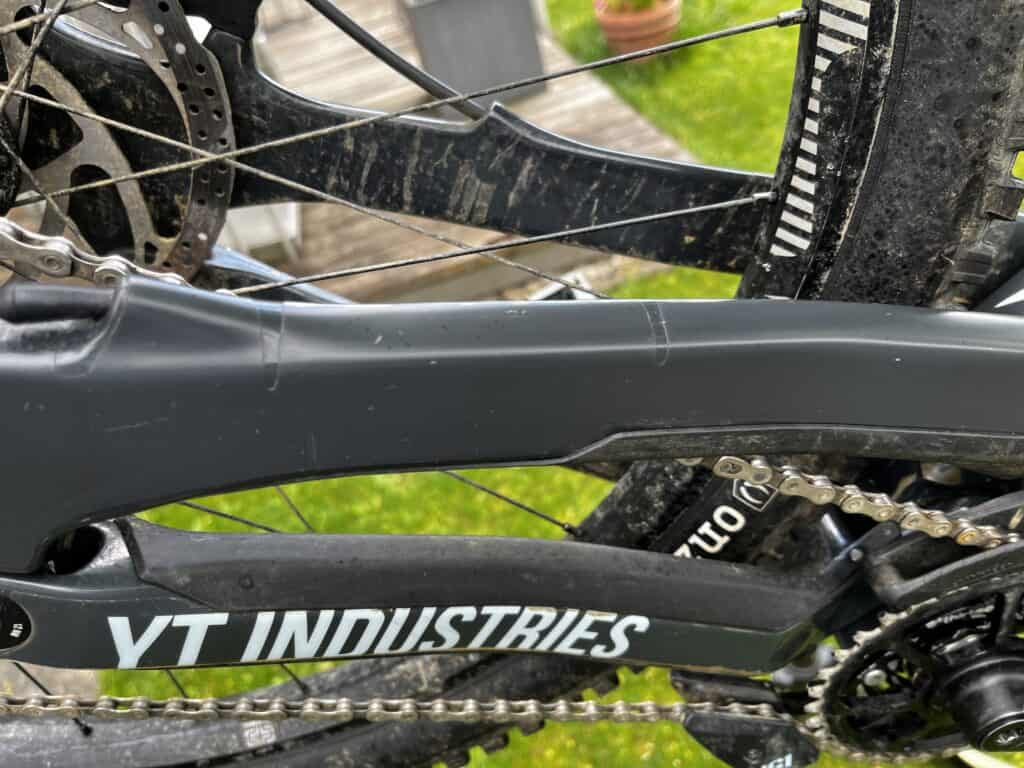
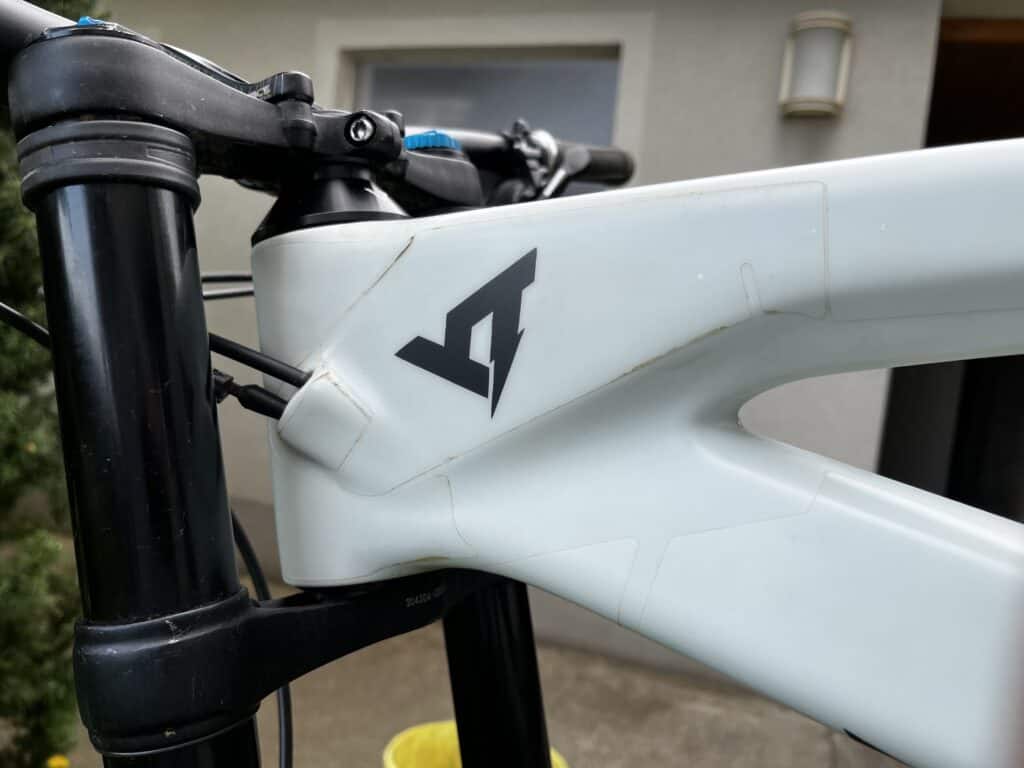
What initially got my attention for the YT Tues was its design. The Tues Mk3 (since 2018) is such eye-candy in my opinion. The entire design is just beefy and clean at the same time. Beefy in the sense, that the frame is quite thick in some spots like the top tube and fork diameters. And clean in the sense that all the pieces and shapes make up for a consistently straightforward overall design though and through. No other bike has done the horst link in such a stylish way as the shock runs parallel with the downtube. All in all the Tues has an aesthetic similar to that of a dirtbike with a single swingarm in the rear and huge forks in the front. Iconic, timeless, and something I could imagine myself looking at for years to come. Especially in that sexy, two-way, black and matte-white paint job.
Size & Fit
As with many of my gear, with my body size, I often fall right between two sizes. In this case, it’s Medium and Large. At the time I was riding a Medium DH bike from another brand, which I felt was a little too small. Additionally, I had the opportunity to try a Medium YT Tues for a lap and felt a little crammed on it.
That is why I decided on a frame size Large and 650B wheel size, which I find is a perfect fit for me personally. For reference, here are, my own measurements:
- Rider Height: 179 cm (5’10”)
- Rider Weight: 80kg (161lb) including gear
Frame size guide for YT Tues 27,5 (2018-now):
| YT Tues 27,5 Frame Size | Rider Height (Centimeters) | Rider Height (Inches) |
|---|---|---|
| Small | 158cm – 168cm | 5’2″ – 5’6″ |
| Medium | 168cm – 178cm | 5’6″ – 5′ 10″ |
| Large | 178cm – 185cm | 5’10” – 6’1″ |
| X-Large | 185cm – 193cm | 6’1″ – 6’4″ |
| XX-Large | 192cm – 198cm | 6’4″ – 6’6″ |
If in doubt and you are unsure of which of two possible frame sizes is the right one for you, think of the intended use for that bike and what you expect from it. On downhill rides, much of the weight is over the front end naturally. To counter that imbalance, for that kind of riding I tend to go for a longer reach option. And my personal preference is to ride a nimble, well-handling bike. I knew the Tues is planted, but extremely light and with 650B wheels should be no problem to manhandle if the situation required it.
Modifications & Changes
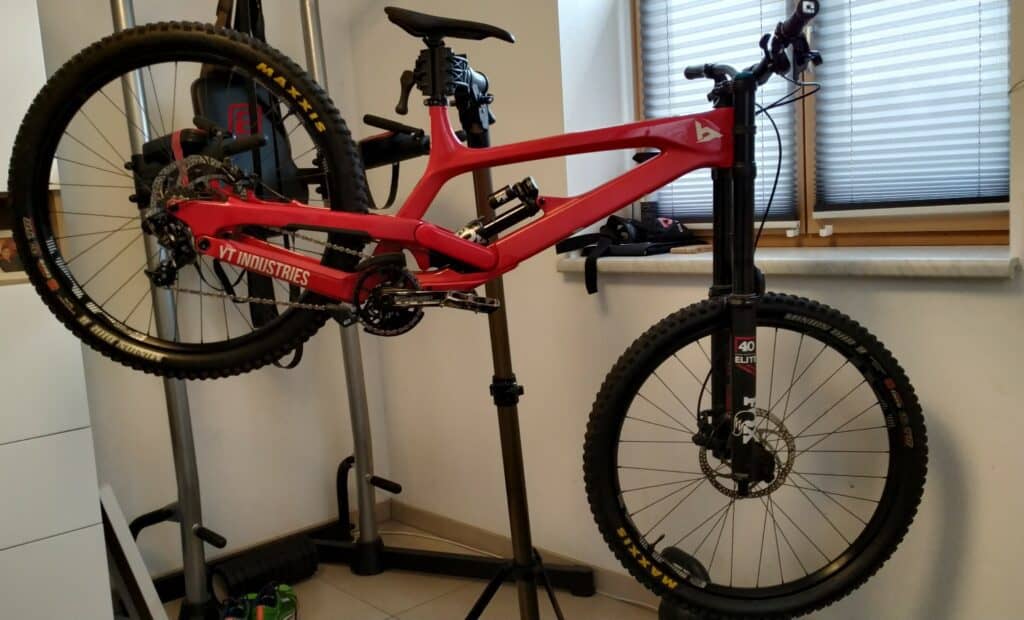
The candy red paint job got old fast
The attentive reader noticed that the color-way of my Tues CF Pro does not look particularly candy red or stealth black – the colors of 2019’s models. And you were right to point that out, as the white and black were in fact only available for the CF Pro Race model. My bike still is a CF Pro by the parts dangling from the frame. Let me explain.
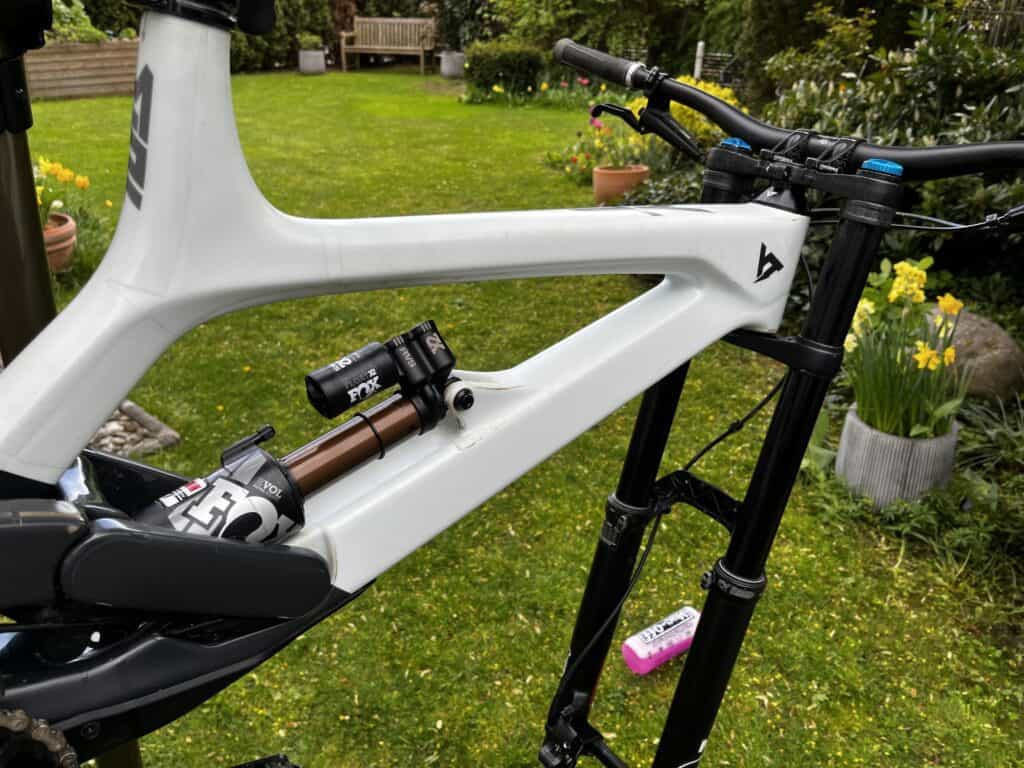
While the candy red paint job really pops and looks awesome in person, it never grew on me. The rear triangle is completely glossy, which actually looks really nice. However, the front triangle is a weird mix between glossy and matte. A glossy tub tube and seat post, while the rest of the front triangle is matte red. Had they left the top tube matte as well, it would look infinitely better in my humble opinion.
Sure, the glossy coating protects the top tube from any normal contact with your thighs while riding. At the same time, the white and black CF Pro Race model did exactly this and kept the separation throughout between a glossy black bottom and a matte white top. In fact, I was instantly in love with that paint job when I first laid eyes on it – but was just not willing to pay the premium on the Pro Race model. So when the opportunity for a new CF Pro Race frameset jumped at me, I took the bait to build my dream bike.
Here it is before and after the frame swap:
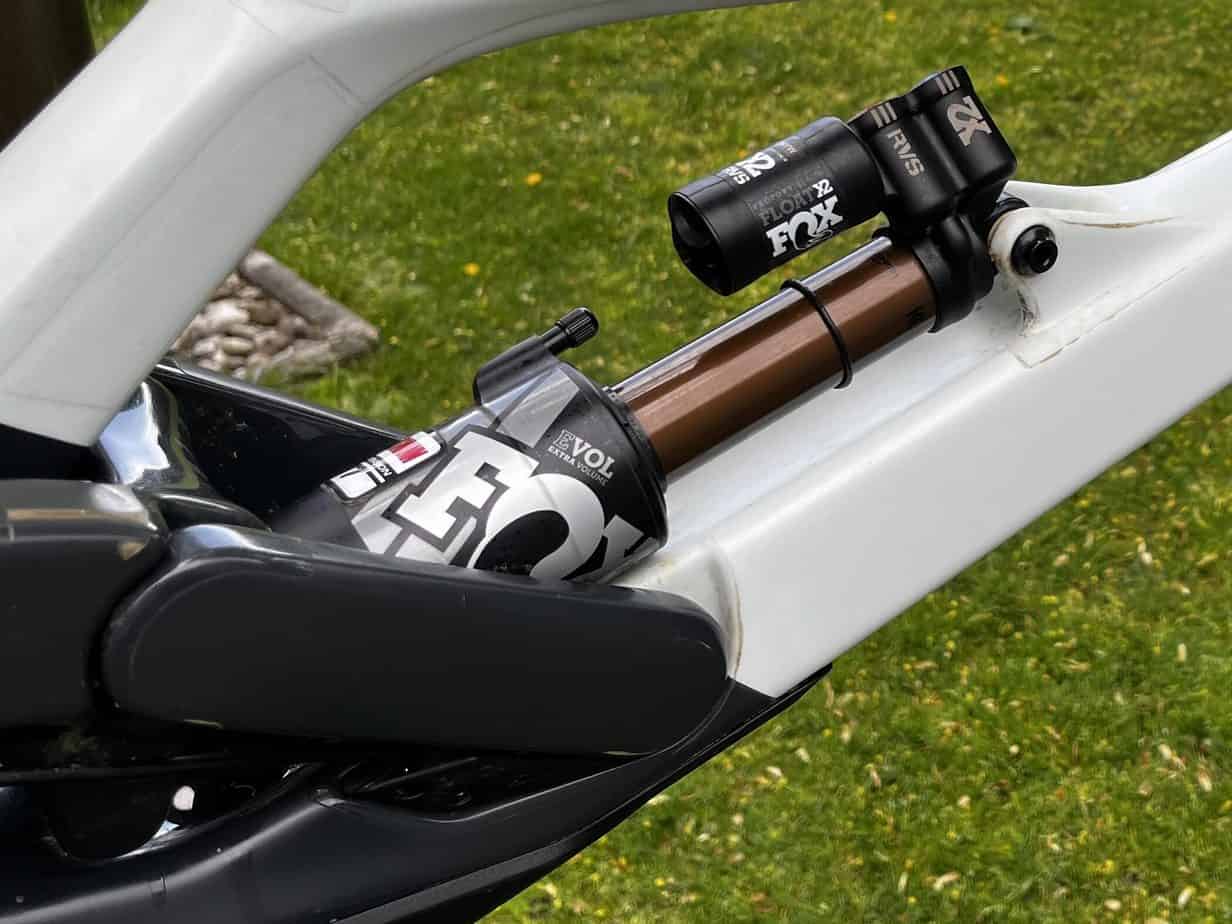
Rear shock
That CF Pro Race frameset came fully equipped with a saddle and more importantly the FOX Float X2 Factory, which just looks incredible if nothing else. Sitting right above the downtube in that fancy-looking Kashima gold. Of course, the main benefit is the individual adjustment of high- and low-speed clickers – which in the end proved to be overkill, as I tend to run a balanced setup and run high-speed parallel to low-speed settings. Deviating the two from each other just doesn’t make much sense to me in most riding situations. In the end, there was no tangible difference while riding between the Factory and Performance Elite dampers.
Frame protection wrapper
As I said above, the unique paint job of my new frame is both glossy and matte. So, I wanted to preserve that look while at the same time protecting the matte paint, which is more prone to damage from dirt, abrasion, and sponges. After extensive research, comparisons, and chatting up support teams my decision was between RideWrap, invisiFRAME, and Easy Frame – all of which offer, high-quality, bike-specific wrapper kits. There was no way to get a mixed kit from any of the brands (except by buying both a glossy and a matte kit) so I opted for a full matte kit, that had the best coverage for the Tues Mk3 CF Frame.
Handlebar width
In my humble opinion, the standard 820mm is just too wide for most riders on a size Large frame. Especially for a downhill-specific machine, you want a wider bar rather than a narrow one. However, you can go too wide as well.
I instantly felt the standard bar was too wide for me but had no idea to what length I should cut it down. This video from Alex and Lee from “Joy of Bike” nerd out over that stuff and offer great insight, which has greatly helped me figure out a ball-park estimate of 790mm, which has worked well.
Here’s the quick and dirty formula: Multiply your height in millimeters by 0,440 to calculate your optimal handlebar width.
Tires
Don’t get me wrong, the e13 DH tires looked baller when matched up with the decals on the e13 rims. There was nothing wrong with them, I just wanted to get back to what I was used to for years and what I also had on my trail bike. So when the e13 wore off, I put on some Maxxis Minion DHR. Without a DH casing. Big mistake. Know your tire casings, people!
A casing not up to the abusive task resulted in a puncture pretty much every day in the bike park. Since I switched to the Onza Aquila 2.4″ DH tires (front and rear) there was none of that going on anymore. Their dependable grip on all kinds of surfaces and in all kinds of weather is astounding.
Brakes
To be honest, a complete swap of the brake set was on my to-do list before I even had the bike in my hands. For me, brakes are one of the most crucial components of any downhill MTB and the power of the TRP Quadiems just did not inspire much confidence from user reports. Not after I was used to the brutal power application of the on/off switches that are the Shimano Saints.
But I was willing to at least give them a chance. Long story short, they convinced me. But only after improving the parts actually generating the braking resistance: the most powerful brake pads I could find (Trickstuff Power). Without them, a brake swap would definitely be in order because of the lack of raw power.
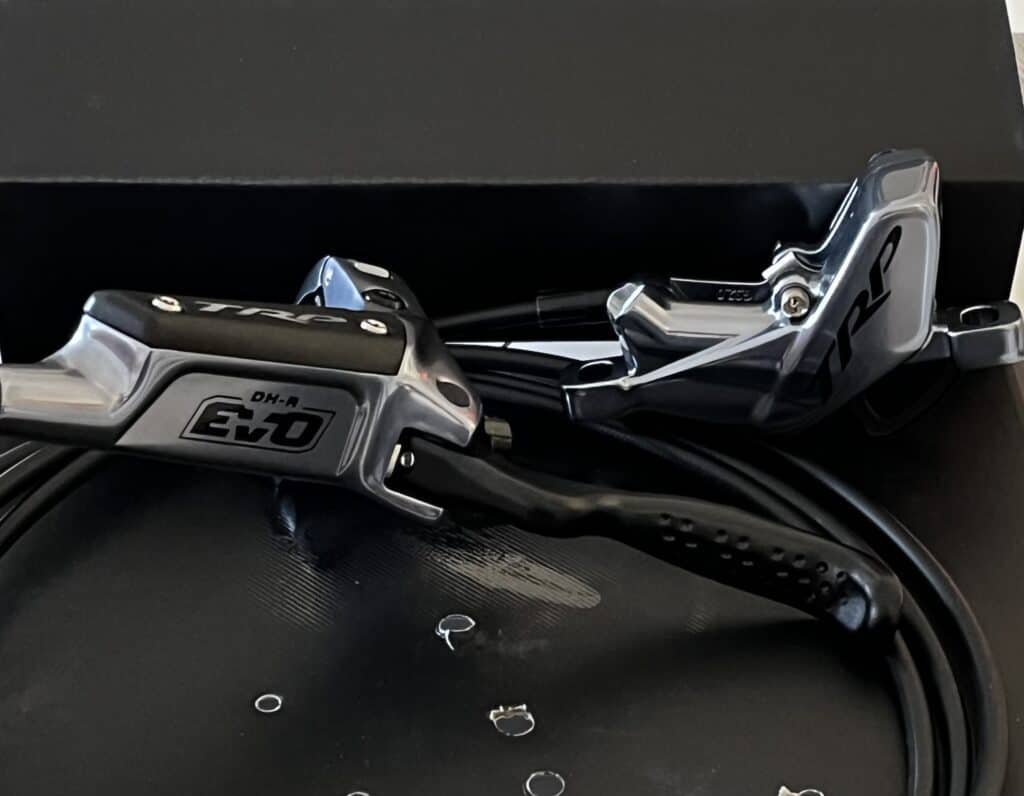
UPDATE: For the 2022 season I finally decided to go with the updated models, the TRP DH-R EVO brakes, that provide the same reliable feel with more raw power out of the box. The only aspect the Quadiems are lacking. I’m not ready to go back to the Saints, the predictability of the TRPs is just too trust-building while braking power is similar – if not more. They are some criminally underrated brakes.
Pedals
Since bikes of that category don’t come with pedals (I am just going to ignore those crappy plastic ones), I should mention what I hooked the cranks up with. As a flat-pedal rider, I kept the Nukeproof Horizon Pro pedals I used for many years before and still perform to this day. They are by far the most grippy and bulletproof pedals I ever owned.
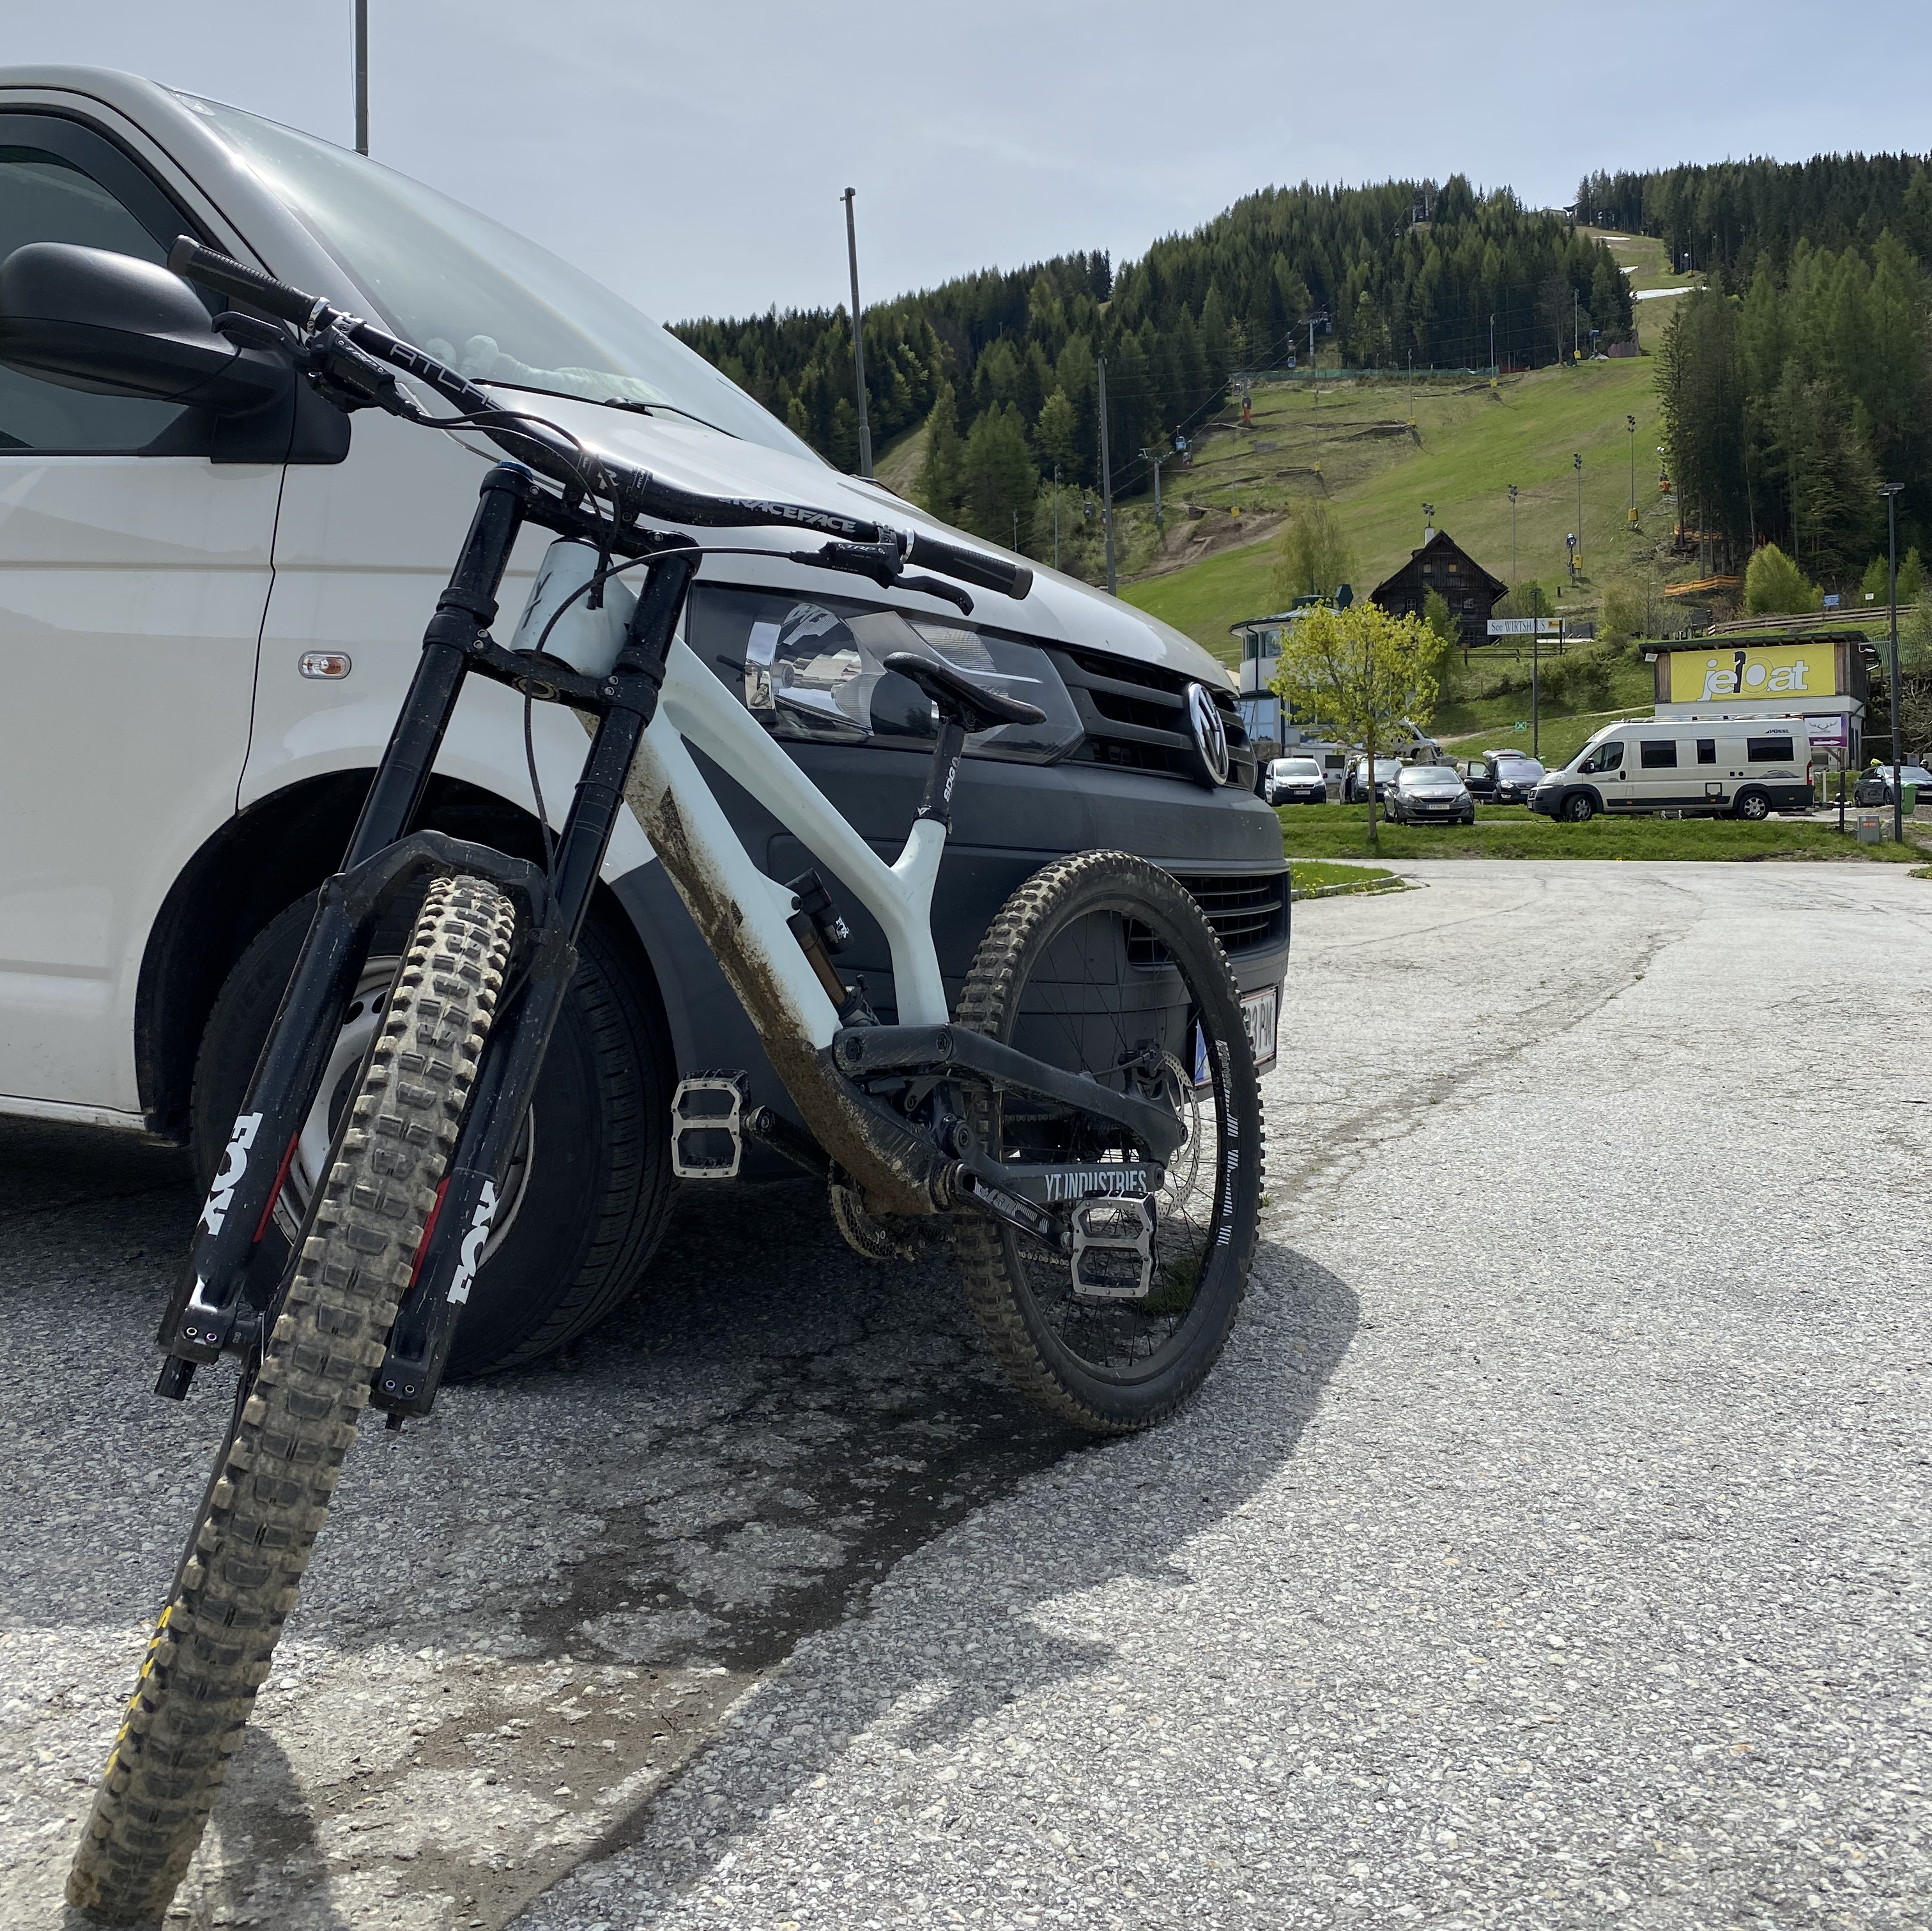
How the YT Tues rides
I will spare you and mumbo-jumbo about kinematic profiles and geometry number citing. That only helps you so far to understand what an MTB is like to ride. At the bottom of this article included the original specifications and frame dimensions if you find those stats useful.
If I had to sum up my seasons of riding experiences with the YT Tues CF Pro, I would say it is composed, predictable, reliable, and unexcited in the best possible way. It instantly rode like a bike I had owned and ridden for years.
Let me explain the unexcited part. During my first couple of laps on new-bike-day, I caught myself repeatedly looking down at the tires because it felt like I was losing air. Not that I lost any traction, but I knew the track well and expected a lot more harsh feedback from the ground and thought maybe the tires were getting softer. It was quite a surreal feeling. And the sight of pumped-up tires didn’t compute. That’s one example of why you may have read the word “dead” to describe the riding characteristics of this bike. It just rides that planted, and almost makes a trail feel as smooth as a fire road. All the while providing all the feedback you need to read the trail through feeling.
I attribute that stability and planted feel to YT’s (Virtual 4-Link) “Horst Link” rear suspension design, which provides a relatively low leverage ratio. The intended anti-rise characteristics make the suspension feel less active and firmer under braking. Generally, it helps the suspension to sit into its travel, which is what you notice instantly. That feeling caught me off-guard, to be honest, but I quickly learned to love it.
Acceleration
One of the biggest surprises for me was how good this bike picks up speed. It’s still weird to say this about a downhill bike, that picks up speed itself by gravity, not by pedaling. Riding my go-to tracks I am very familiar with on all bikes I ever owned, there was no mistaking that phenomenon. Out of corners or on rough, bumpy, speed-robbing terrain this thing just picks up and carries velocity steadily.
Initially, this went so far that I was constantly overjumping jumps I had ridden hundreds of times before. It’s just so effortless to build speed on that steed.
Riding position & cockpit
Although the Tues had many components I was not familiar with, the sum of all parts felt comfortable from the beginning. Comfortable enough for me to quickly gain trust and confidence and helped me focus more on the terrain than how to adjust to the bike.
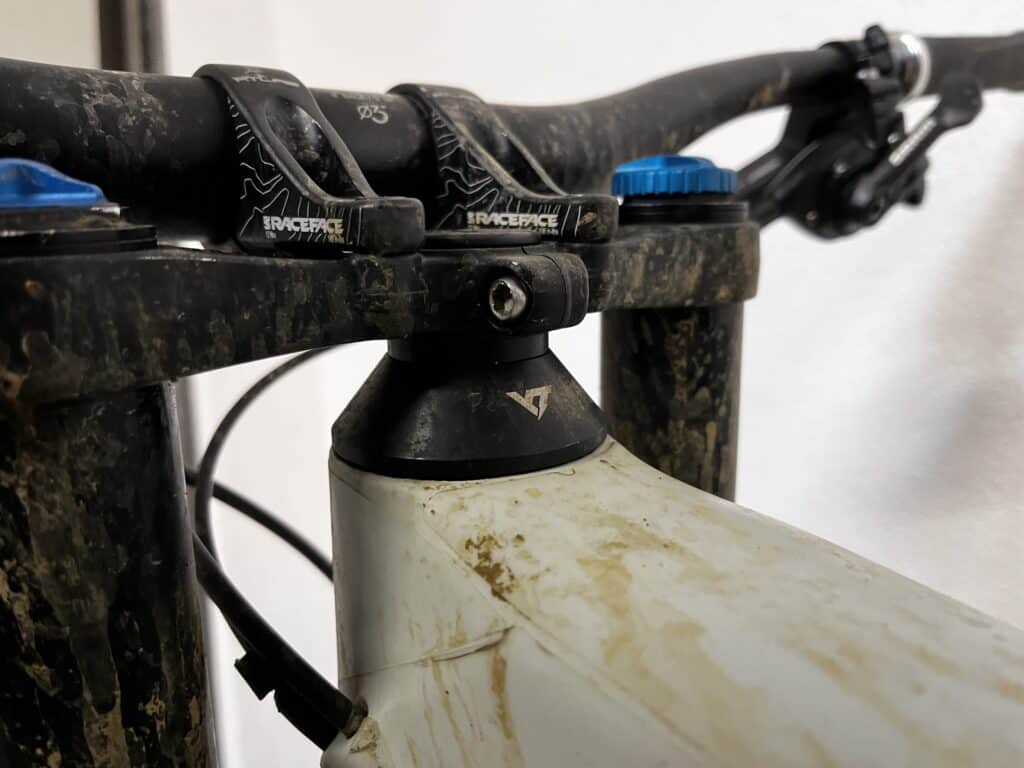
Though, one aspect I struggled with a bit, was the cockpit. It had literally no part I had ever used before. There were a couple of problems I needed to solve, which made it hard to figure out exactly what to attack. First, the bar itself was overly wide at 820mm, so I cut that down to 790mm after doing some research and playing around with hand and brake lever placement. Next on my list was the bar roll, which has kept me busy for quite a while. Same with stack height. After some trial and error, I found my personal happy place with the standard load-out and stayed with the RaceFace Atlas handlebar and stem combo.
Noise
Noise reduction is one underrated feature of gravity bikes and probably one of my personal favorites of them all. I had enough time on loud, rattling bikes to know that the sound you hear from underneath you has a huge impact on the trust you have in your ride. Clanky metallic noises can seriously play mind games on you and create doubt when technically all is well.
Luckily, bike noises can be reduced on any bike, even if it does not come factory – and I highly recommend looking into it.
On top of that, a quiet bike lets you hear the tires munching at the ground, the suspension hustling up and down, and brake pads hugging the rotors. It’s such a different, almost meditative, experience. With the benefit that you can not only feel but also hear what and how your bike is doing in real-time. It’s literally an extra sense gauging the track and how you are doing on it. Feel free to check out some of my riding videos with this bike on YouTube.
YT achieved additional noise-canceling by sticking rubberized protection in the right places (chain and seat stays), as well as a cute little patch near the mech hanger. Also, the horst link is just designed without any excess fluff, making it work reliably and quietly. Take the rear suspension design of the Canyon Sender for a comparison. The noises that thing makes (more and more over time) is what turned me off that otherwise beautiful bike.
Suspension
On my very first rides, the rear shock rebound felt too slow, resulting in the bike sitting deep into its travel all the time. It felt completely unbalanced with the front end getting light while the rear was bottoming out unnecessarily during gentle warm-up laps. Nothing a couple of clicks couldn’t fix.
Other than that first adjustment, I kept the clickers and dials pretty much standards after adjusting the sag for my weight. To this day I am surprised with just how well the back of the bike sucks up high-speed chatter and big square edges all the same.
Upfront, the Fox 40 Performance fork never felt harsh or rushed through its travel too easily. I played around with a couple of clicks in either direction but ended up back in close range to the recommended settings for my weight.
I don’t know what else to say. There is a reason the YT Tues is described as predictable and confidence-building all over.
Brakes
Now we come to what was my biggest concern of all before committing to my purchase decision. The powerful Shimano Saints were my go-to stoppers up to that point. Their application of power is not unlike that of a light switch – on or off with little room for modulation in between. And I loved it, still do. Same with the shape and feel of the brake levers.
With those high expectations going in, TRP’s Quadiem brakes initially let me down. They just do not bite nearly as strong. Which is by design. Their strong suit is definitely controllability and reliability, which becomes apparent quickly. This whole time now I had zero issues with brake fade or pumping (impressive when all you do is go downhill), which was the biggest problem with the Saints and the reason I won’t go back.
Ready to give them a chance, I just needed to figure out how to extract more deceleration power. Focussing my attention to the parts actually creating friction – the brake pads and rotors – I got the result I needed. Step 1: Mount the most powerful pads I could find, the Trickstuff Power+ pads. Step 2: Proper bedding in of the pads and rotors.
Fundamentally, the Quadiems contribute to the overall theme by feeling reliable and trustworthy in any situation. There is no flex in the aluminum levers and there are no surprises. I contribute much of the predictability of the bike to the TRP brakes. They’ll let you know when you are on the tire’s limit or close to going over it and allow you to correct incrementally instead of locking up completely, which is near impossible to recover from on the front tire. Just the vast reduction in the number of front-wheel washouts speaks for itself.
Wheels
Despite a number of unnerving noises I extracted from them over the years, both rims remained basically problem-free. While the LG1 rims definitely held their composure, you can tell they have been abused by the dents and scratches. Not by any dip in riding performance tho. I often wonder if I could say the same about e13’s carbon DH rims.
They do get dinged up relatively easily compared to what I rode before. Those dents resulted in them not being able to seal tubeless tires anymore. That does not make a difference for me on track, but ist still worth a mention. All in all despite those bruises they never ran untrue, took on an oval shape, or broke any spokes. They only needed the usual tension adjustments.
Durability & Maintainance
With the abuse, any downhill bike has to endure, stuff will break or wear out eventually. There is no way around it. Some more than others. Some expected, others unexpected. Here I will accurately report what I needed to fix and what broke outright over the past seasons.
The biggest showstopper of them all was a crack in the rear triangle of the frame. Which sounds horrible, and it is. But it could have been a lot worse. I can’t point my finger exactly to one event that caused it. More likely it was the constant hammering on rough, dry summer tracks. The problem was handled professionally by YT, which you can read more about below under “warranty issues”, albeit not as fast as I hoped.
With the change in that triangle, I used the chance and time to replace frame bearings preemptively. There hadn’t been damage or corrosion to them yet, but it was a time as good as any to go through that regular maintenance process. To this day there hasn’t been an issue with the bearings, which is a testament to their quality and the dust seals. Getting the correct actual bearings for your frame is the true project here.
Headsets are not exactly an exciting topic. They usually don’t get mentioned, unless there is something wrong with them. Well, here we are. The Tues gets shipped with an Acros headset and if you read any forum posts or reviews at all, you’ll know where I’m going with this. The headset from Acros is guaranteed to be a predetermined breaking point. Just calculate an extra $40 in with your bike purchase, if you see an Acros headset on the spec sheet. This will need replacing (with another brand) at some point in the future, probably more sooner than later. With that being said, it’s not worth the hassle to try and get another Acros headset under warranty. They do not last and only cause headaches. As for me, I got one from Chris King (still going strong) and threw it in there as soon as I felt the original one breaking down in season one.
As I said before, the LG1 rims get dinged up relatively easily. Mine are not tubeless-ready anymore because of some rather hefty dents. Still, nothing to lose your head about or go out and get a fresh set of wheels for. They were never untrue, or oval despite all the hard hits and embarrassing cases. Of all my spare spokes, I never needed one yet – knock on wood.
After a couple of seasons and some particularly nasty, sloppy days in the bike park, the bottom bracket also took its toll. Finally, some muck managed to creep in for those awful feeling and sounding grinding with each pedal stroke.
It wouldn’t be a list of common damages if I didn’t mention a bent rear derailleur, or rather a bent derailleur hanger in this case. Luckily this little pre-determined breaking point is an actual replacement part and not part of the frame itself! YT still offers a backlog of hangers for their (stone) old models. Prices are a little steep at $20 last time I checked. Still less than a derailleur and if you keep your eyes peeled you might find them elsewhere for 4 bucks as I did. My recommendation: Keep a stock of 1-2 hangers just in case. This is not a part that’s available in any LBS or trail center.
And last but not least here’s one I consider to be a wear part, and that would be the ODI AG-2 grips. After two seasons of harassment from my sweaty hands, they were through with me. After all the crashes and tip-overs the bar ends still were holding up, but the grip surface started to wear off and get slippy. Very satisfied with their feel and longevity, I got the same ones again only in a new, fashionable color (black).
Wrenching on the Tues
YT thought it through. Easy as that. There is no need to break your fingers working on your own bike. It’s simply mechanic-friendly and I’m so glad I can finally say that about a bike I call my own.
First of all, the bike does not need much in the way of active maintenance in the form of constant bolt-tightening, bearing-greasing or wheel-true-ing. Just keep to the baseline stuff and give it what it needs and it’ll do just fine. The Tues is proactively built strong and designed to withstand the inevitable abuse.
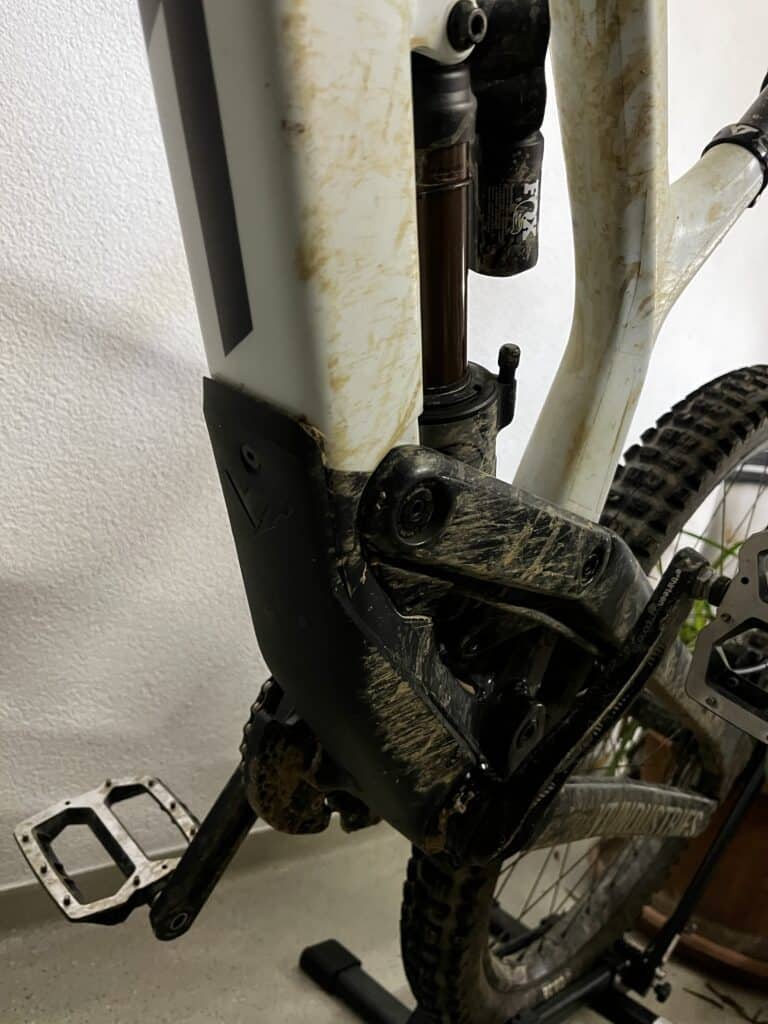
As an example, take the moto-inspired “skid plate” on the bottom of the frame, covering the bottom bracket. With all my previous and current bikes, this is a spot that sooner or later meets a boulder, root or rock thrown up from the front tire. It’s inevitable if you plan on riding your bike at all. With that removable frame protector, those hiccups won’t damage the high-end carbon frame, but rather some piece of plastic you can change out.
The pivot bearings I mentioned before, don’t use a retainer, making room for additional balls to be fitted, to keep things running smoothly longer. High-stress pivots got dealt double row bearings to help handle the higher demands on them.
When the time comes and you do need to get your hands dirty with some repairs, it’s designed to make the experience better by a lot of intricate nuggets.
A look at the drive-side of the Tues reveals an obvious one, that at the same time contributes to the clean look. Except of the chainstay pivots, all hardware is accessed from the non-drive side. Not that a regular joe would access those bolts regularly, but if you do there is no awkward dancing around the bike stand going on.
One quality of life improvement you will see more often (anytime removing the rear wheel) is the self-locating lobe on the end of the rear axle. It helps you find its destination and keeps the threads lined up preventing cross-threading during any trail-side tire repairs.
All cables and hoses are routed internally and neatly, doing their share to keep the affair rattle-free for an extremely quiet noise profile. All these separate small intricacies give the impression that even the smallest details have been meticulously designed to keep mechanical problems at bay and provide a great riding experience with everything working as you’d expect.
Warranty issues
You might know, that on top of the statutory two-year warranty period, YT tops that off with a further voluntary three-year guarantee on all YT frames after 2018. This is awesome, especially for the up-front risk any customer is willing to take by ordering a multi-thousand-dollar bike online before riding it. There is however a caveat to that.
Read their Terms and conditions carefully! This additional guarantee is only applicable to the original buyer and cannot be transferred to any second-hand owner.
As a participant in YT’s “Crash Replacement” program for original owners, I can attest to its legitimacy. My reason for checking that program out was a chainstay crack, which seems to be a common issue I have seen discussed in various forums. Annoying, but luckily there was no further harm to me or the bike.
It’s not completely free, however. For a relatively small fee, you can get a brand new frame part. Here is a link to the YT crash replacement program.
All in all, the entire process took longer than I was hoping for; which was most likely to the chaos during the summer of 2020 that ensued after the cycling industry had more customers on their hands than they knew what to do with. That’s a systemic problem, that affected YT just like most any business. My take-away from that was that the (EU) support is motivated to help, but does not always have the necessary resources to do that in adequate time.
Wishlist for YT Tues model updates
Fork bumpers on the frame, not the fork. For a carbon bike in that price range, that should be standard by now. These rubber rings rotate and move too much and need constant adjustment to ensure the fork stanchions can’t have contact with the frame. Because it will, and any damage from having such a cheap part missing is a shame. I have seen Tues riders put their own bumpers onto the frame, which is a really clever idea I can get behind.
Dedicated downhill brake-set. The standard TRP Quadiem (or SRAM Guide R currently) just doesn’t cut it in my opinion. At least not with the standard brake pads. For all but the highest-end (most expensive) models, there is some kind of upgrade necessary. Before you change the brake set entirely to something more to your liking, try a better set of brake pads like the ones from Trickstuff labeled “Power” or “Power+”. Those things are real ankers and change the brake performance dramatically.
Ship with an 800mm handlebar on sizes Large and smaller. 820mm is just silly and nearly everybody needs to cut that down. With 800mm you at least got the right width for some riders.
Just drop the Acros headsets in favor of more reliable ones. Any cost savings from these parts is not worth the guaranteed headache for the consumer or the support team for that matter.
2019 YT Tues 27 CF Pro Spec Sheet
In order to prevent confusion about the exact specifications of the 2019 line-up, here is the list of parts the bike originally shipped to my door with:
Frameset
- Frame: High modular carbon fiber; internal cable routing; downtube, seat stay, and chainstay protection; 200mm rear suspension travel via a “Virtual 4-Link” rear suspension
- Fork: FOX 40 Float Performance Elite, 20TA x 110mm, 52mm offset, 203mm suspension travel
- Shock: FOX Float X2 Performance Elite, 267mm x 89mm
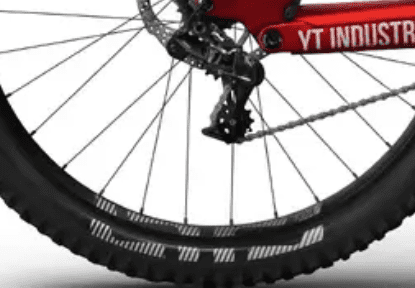
- Color Options: “Candy Red” and “Stealth Black”
- Head Tube Diameter: Tapered
Cockpit
- Headset: Acros AZX-255, high cap
- Brakeset: TRP Quadiem with 203mm rotors (front and rear)
- Handlebar: Race Face Atlas, 35mm rise, 820mm width
- Stem: Race Face Atlas 35, direct mount, 50mm length
- Grips: ODI AG-2 Lock-on
- Saddle: SDG I-Fly 2.0, YT custom, red/silver
- Seatpost: SDG I-Beam carbon, 300mm length, 30.9mm diameter
- Shifter: SRAM GX, 7-speed
Drivetrain
- Rear Derailleur: SRAM GX DH, 7-speed
- Chain: SRAM CN-1130
- Chainring: e*thirteen, 34 tooth
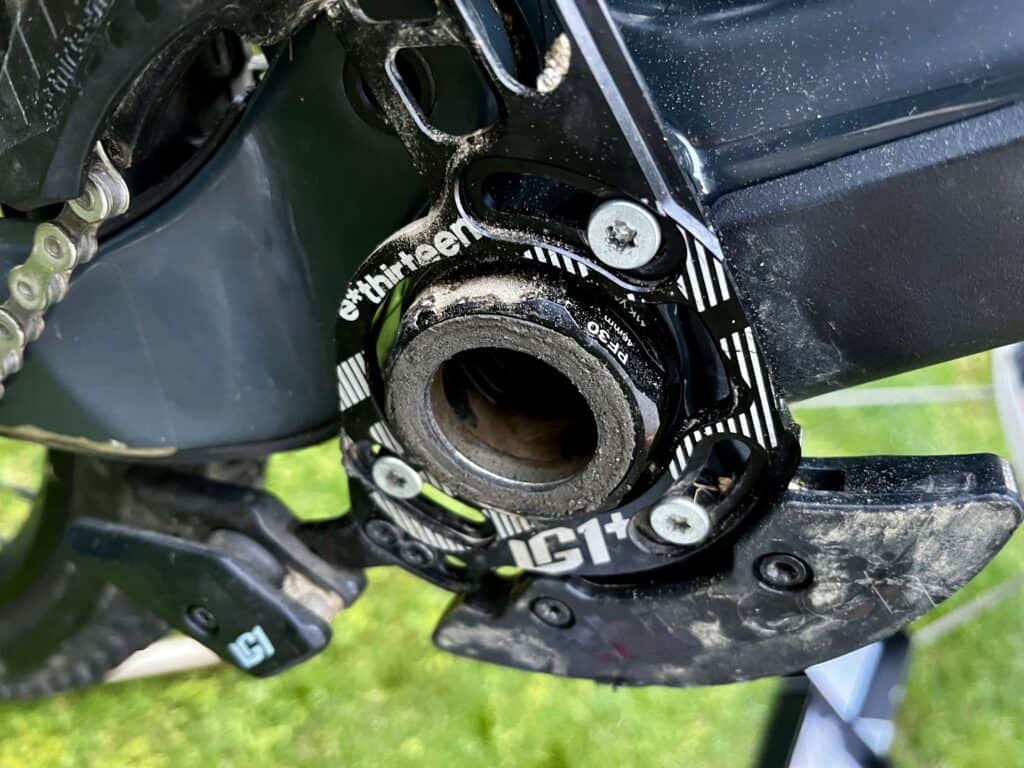
- Chainguide: e*thirteen LG1 Plus
- Crankset: e*thirteen LG1 Plus, 165mm length
- Bottom Bracket: e*thirteen press-fit 30, 83mm
Wheels
- Hubs: e*thirteen LG1 DH Plus, 20mm x 110mm front, 12mm x 150mm rear
- Wheels: e*thirteen LG1 DH Plus Alloy wheelset, 30mm inner width
- Wheel Size: 27.5″ (650B)
- Spokes: e*thirteen LG1 DH Plus wheelset
- Tires: e*thirteen LG1 DH Plus, 27.5 x 2.35″
Frame Geometry
| Size | Small | Medium | Large | X-Large | XX-Large |
|---|---|---|---|---|---|
| Top Tube Length | 584 | 606 | 633 | 659 | 682 |
| Head Tube Angle | 63.5° | 63.5° | 63.5° | 63.5° | 63.5° |
| Head Tube Length | 100 | 105 | 115 | 123 | 129 |
| Seat Tube Angle | 73.5° | 73.5° | 73.5° | 73.5° | 73.5° |
| Seat Tube Length | 400 | 400 | 400 | 420 | 420 |
| Bottom Bracket Height | 351 | 351 | 351 | 351 | 351 |
| Chainstay Length | 435 | 435 | 435 | 440 | 440 |
| Wheelbase | 1.199 | 1.220 | 1.248 | 1.278 | 1.302 |
| Standover | 707 | 709 | 714 | 723 | 727 |
| Reach | 410 | 429 | 452 | 474 | 495 |
| Stack | 601 | 605 | 614 | 621 | 636 |
