Best DJI Osmo Action 3 Settings for Cinematic MTB Footage

When filming with an action camera like the DJI Osmo Action 3, the expectation is footage that looks cinematic, intense, and true to life. But when you go out with your new action cam and you play back your footage, it looks nothing like the promo videos. The problem is the automatic video setting.

DSC05198 edited
PRO Settings are key to good-quality video.

And that’s the case for even the best action cameras out right now. None is going to look very good out of the box with fully automatic factory settings.

Like all action cams, the DJI Osmo Action 3 does have automatic video settings to compensate for all variables during a ride.

But automatic settings always tend to be all over the place when left unchecked, creating inconsistent, amateur-looking films. This is why it’s recommended to use semi-manual settings.

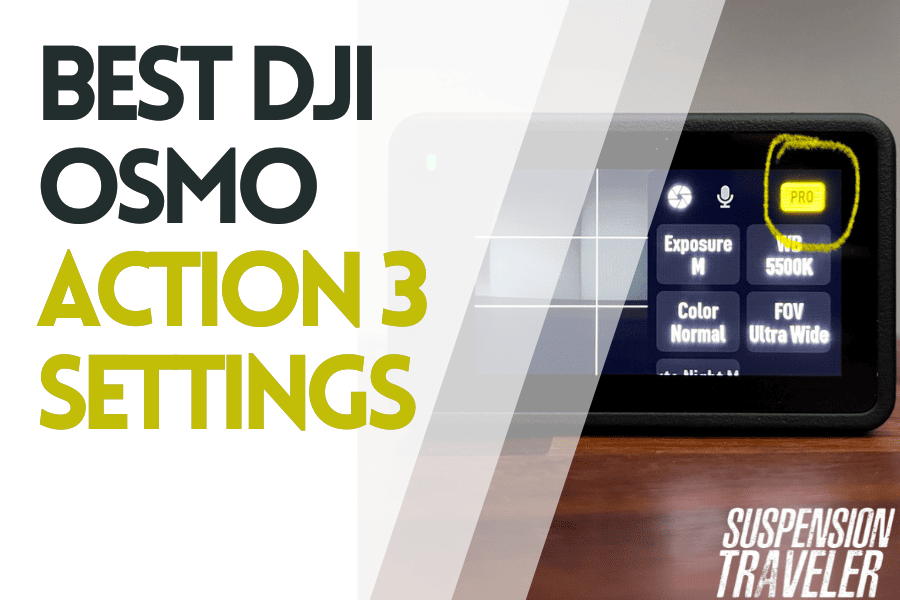
After months of riding and recording hundreds of clips in various weather and lighting conditions, testing video settings and accessories I found an ideal setting preset for filming with the DJI Osmo Action 3.

Find my current camera setup here. In this resource, I list all gear I use to make quality MTB POV videos for the Suspension Traveler YouTube channel.


Recommended DJI Osmo Action 3 settings for cinematic footage:

  • HDR Mode: On (includes 10-Bit Colors and D-Cinelike)
  • Resolution: 4K
  • Framerate: 30 FPS
  • Stabilization: (regular) Rocksteady 3.0
  • Field of view (FOV): Wide or Ultrawide
  • PRO Settings: On
  • Exposure: Auto
  • EV: -0.3
  • White Balance: 5500K
  • Wind-noise reduction: On or Wind-Sock
  • Stereo: On
  • Directional Audio: Off (improves wind noise)

Settings to use with an ND Filter

These will keep stabilization intact and grain in check. You’ll need manual exposure control here, which is only available in normal Video Mode, not HDR.

  • Chest mount: Shutter 1/240 and ISO max 1600. ND4 or ND8 should be fine.
  • Helmet mount: Shutter 1/120 and ISO max 1600 with ND8

These will work in difficult, changing lighting conditions like under tree cover and direct sunlight as well as overcast weather.

The camera will only adjust the shutter speed and ISO automatically within the range you set. Everything else is in your control and will repeatedly lead to amazing video quality!

This way you can make sure the stabilization works at all times, even in dark spots. Everything else is in your control and will repeatedly lead to amazing video quality!

For low-light situations or at night, a few tweaks are necessary to get optimized settings. There’s a full article dedicated to filming with the DJI Osmo Action 3 in low-light.

Forest Fade LUT by Suspension Traveler

Color Grading for Action Cam Videos

Make your POV footage pop with custom color grades!
Download my FREE LUT specifically for MTB videos:

In order to keep shutter speeds low (four times the frame rate is okay with stabilization still working), you could use ND filters like these on amazon to reduce exposure, but they are definitely optional and have limited usefulness, especially in changing light conditions.

DSC05199 1
Back to the rugged design and equipped with more cutting-edge tech.

Below I explain what each of these settings does in detail and why certain settings are preferable over others.

But first, here is some test footage using these exact settings. I only did color correction in an editing program, taking advantage of the D-Cinelike color profile.

DJI Osmo Action 3 MTB footage with the above settings (only difference: FOV is set to Horizonbalance).

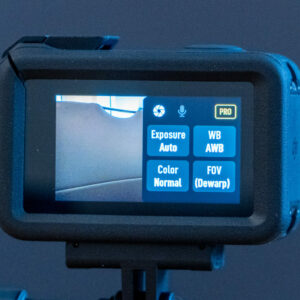
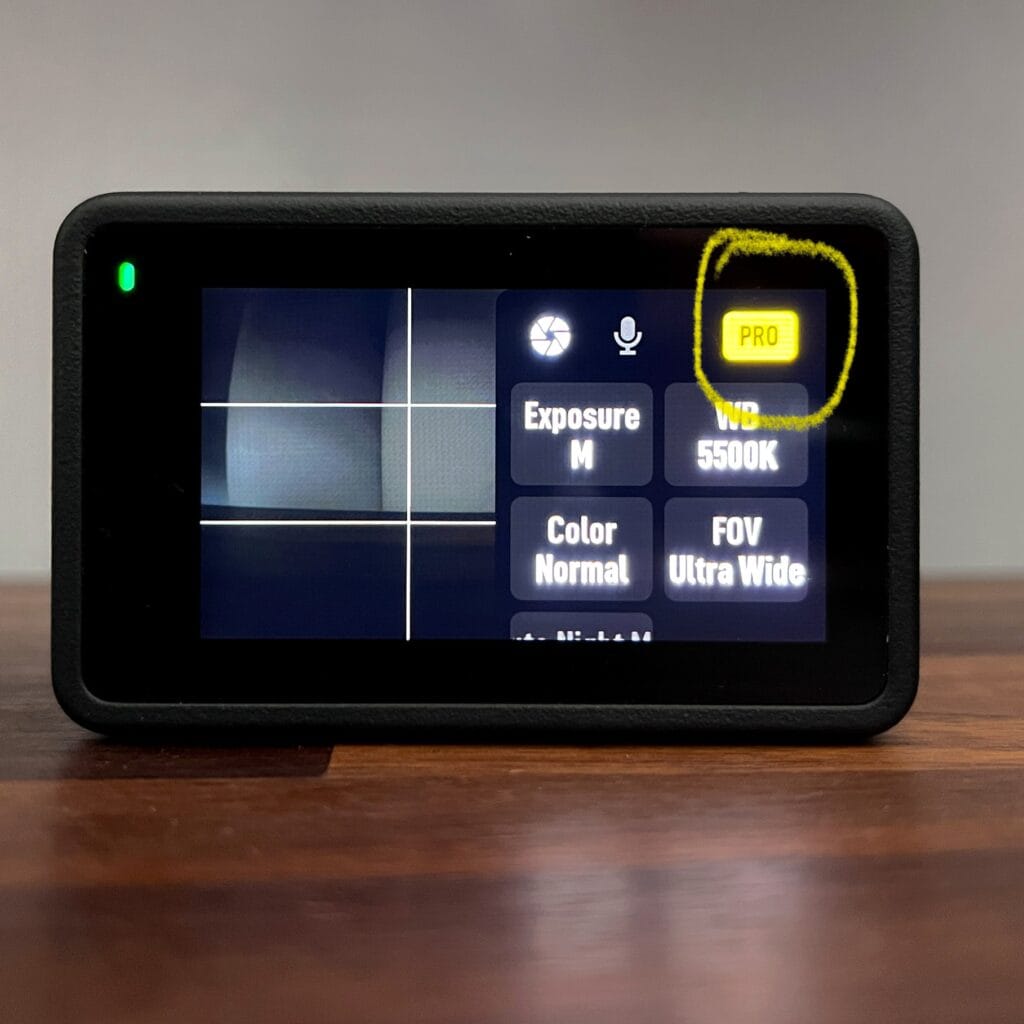
How to unlock the DJI Osmo Action 3’s PRO settings:

In order to gain access to the full list of settings, you need to activate PRO settings.

  1. Simply access the camera setting menu on the right of the screen.
  2. And on the top right of that menu, you see the toggle for “PRO” settings.
  3. It’s activated when it’s yellow instead of black.

You immediately see additional settings added when it’s on. The detailed video settings are accessed through the menu on the right side. See the pictures below for reference.

13C1B616 4436 4C33 A08B AD0F320DBF8B 1 201 a
Access recording setting menu from the right
4A7EBC30 7A10 4F7B ABDF B33D183D2D76 1 201 a
Show PRO options at the top right

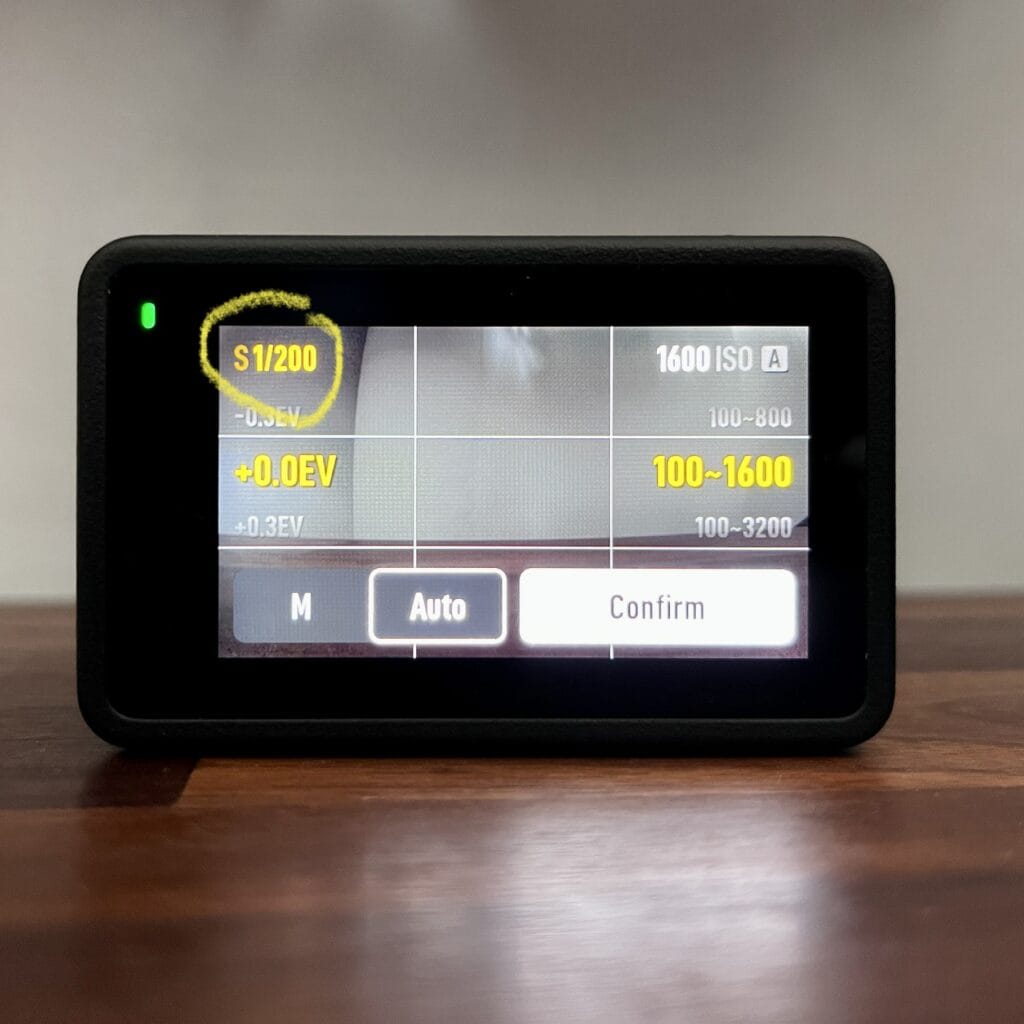
How to set shutter speed range

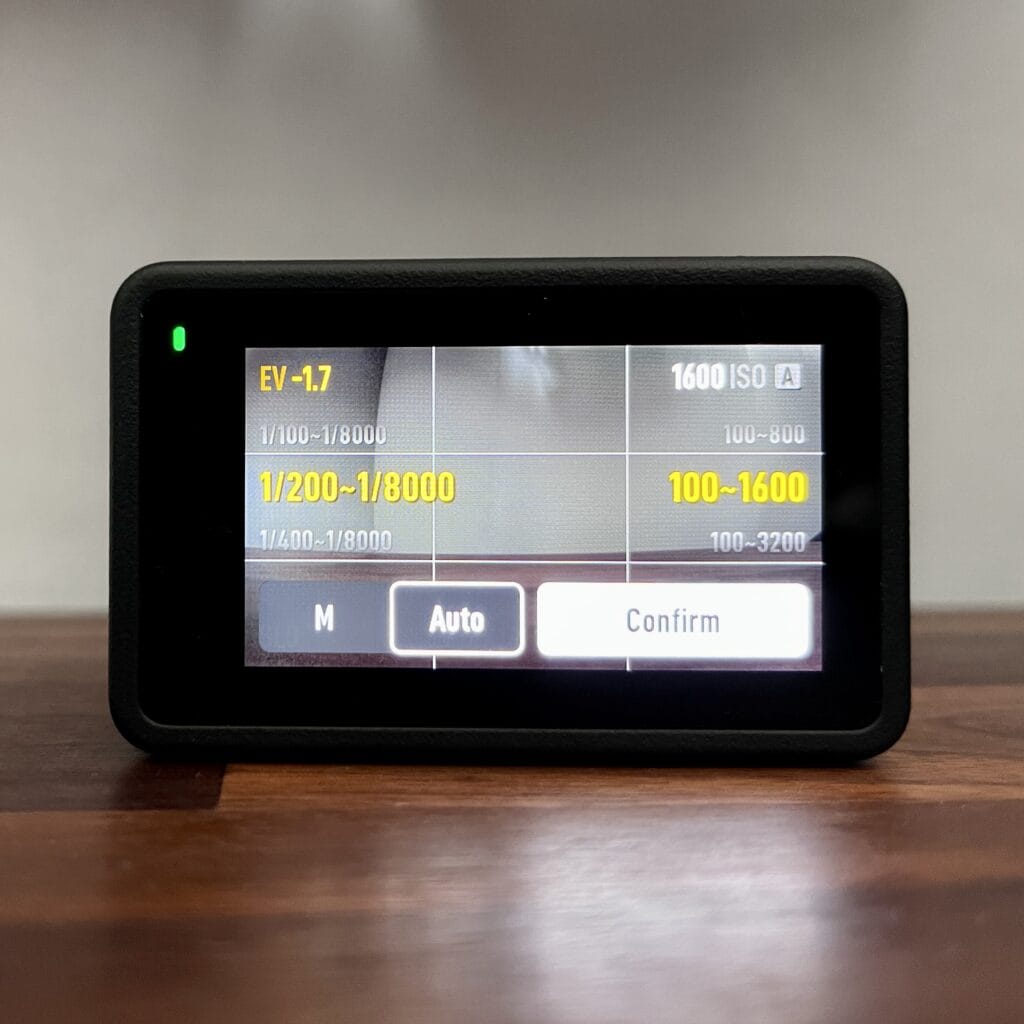
Now in the exposure settings you can choose between Manual and Auto exposure. Only in Auto you can select a shutter speed range. Simply open the menu and tap on the Shutter option in the top left.

Now you can limit the minimum shutter the camera can fall back to when in low-light scenarios!

By setting the minimum to 1/200 you can guarantee that the camera can always stabilize the footage, even when it gets dark. It will max out the ISO when shutter can’t get any slower.

28DC02B7 5BE6 4740 954A C66DF0E2059A 1 201 a
9057B75D D8C3 44F5 BBA7 ECCC9E55A5EA 1 201 a

So, there you have it. Those are the semi-automatic settings that record cinematic, well-balanced footage that looks more like what you experience through your own eyes. Read on further down for a deep dive into what each setting does.

Just by changing a couple of very simple settings on this camera it really does make a huge difference in how we capture the awesome things we do out there so that we can share them with our friends.

It makes sense to capture it as close to what it looked and felt in real life. The standard auto setting on this camera is just really far away from that.

action cam settings cheat sheet 1

What the DJI Osmo Action 3 settings mean

Resolution: 2.7K or 4K

I’m sure you know this one: pixels count in relation to the aspect ratio. But there’s more to it in an action cam!

The way stabilization works is through software. The camera actually crops into the frame a little bit to be able to seemingly “remove” movement from the picture.

That also means the real captured resolution of the final video is usually a little lower of the actual file. That’s why 1080p will look more blurry and a minimum of 2.7K is recommended.

I use 4K all the time and don’t change it ever. If you got a 4K monitor or high-res phone screen to enjoy all those pixels, the higher resolution is even nicer to look at. It’s incredible fidelity to experience!

Look across the mountain trail into the opposing mountain range in an image fidelity only 4K resolution can provide.

Framerate: 30 fps

This is what produces the natural motion blur, similar to what you would see through your own eyes. Framerate of 24, 25, and 30 are a big part of what makes video footage cinematic. Bonus points for making you seem to ride faster, every other setting being the same.

For POV shots I believe 30 FPS works best, especially with quick direction changes like riding turns or head movement from left to right. But there’s nothing wrong with 24p or 25p. Those have a more cinema-like look to them. It’s up to you.

Often 60 FPS are used for slow-mo or fast-twitch action footage that still looks crisp. 50 or 60 FPS give your footage a sharper look without motion blur so trail features are more pronounced if that’s the look you want to achieve.

High FPS of 60 and above allow for slowing footage down for a smooth slow-motion effect. At regular watch speeds, there is no tangible difference between 60 and 480 fps. Your SD card may disagree as it fills up much quicker.

Fewer frames per second allow for natural motion blur, that not only looks very cinematic and professional but as a bonus also makes the footage look faster than with a higher framerate.

This MTB ride was recorded at 25 FPS as I knew there were not as many turns and I could achieve more motion blur in the cloudy weather.

Image stabilization: Rocksteady 3.0

On a bike, it’s critical to use any one stabilization option, preferably the new RockSteady 3.0

Horizon leveling mimics a gimbal that’s keeping the camera level. I don’t recommend it for biking, because the FOV gets much smaller. It’s a cool effect tho, especially doing a follow-cam where the subject is in front like in the example video at the top.

Caution: Horizon Leveling crops into the frame dramatically to be able to keep the image leveled by software processing. This means the FOV is locked at “Dewarp”.

Above and beyond a stable image is the most important feature of any camera strapped to your helmet, chest or bike. I used to own the first generations of GoPros, but any mount besides the helmet mount was completely unusable because of the shaky footage.

Now chest mounts are all the rage (GoPro’s Chesty 2.0 is still my favorite tho).

White Balance: 5500K

When left on auto, the camera will constantly color correct, while not knowing what it sees. If the screen is full of green grass, or brown dirt, it will choose a white balance that reduces green or brown from the image resulting in weird-looking color fluctuations.

This is why auto settings will always look amateurish, no matter what you do in editing.

The WB setting is one of the biggest difference makers.

This is an outdoor camera. And sunlight has a color temperature of about 5500 Kelvin. Easy as that. Set it once and never change it again. You wouldn’t want your white balance to change from clip to clip or even worse within a clip.

In addition, white balance will destroy the warm natural hue during sunsets – a period also called the golden hour. 6000K may be okay on a cloudy day to avoid a blue hue or to make a sunset pop.

Getting a golden hour ride in for some dramatic colors. FOV: Wide.

Field of view (FOV): Wide or Ultrawide

A wider FOV can help with a couple of effects: the sense of speed and capturing reference points the viewer can identify with. Since on a bike both hands are occupied, the camera needs to be able to see a lot without moving the camera angle.

The Osmo Action 3’s 155-degree FOV is arguably the widest right now (apart from 360° cams) and creates incredibly intense footage.

Generally, a wide FOV is able to capture the ground, ahead on the trail and the bike as reference for the viewer within the same shot.

A view from on top of the helmet sometimes only has a view of the trail ahead and much of the feeling gets lost for the audience since there are no reference points. No arms, no bike frame, no handlebars.

This clip was recorded with a chest mount and the Ultrawide FOV setting.
Notice that a lot of the bike frame and even my helmet can be seen from this perspective.

Color: D-Cinelike

Nothing is inherently wrong with the “Normal” color profile, which sports the popping colors you’d expect from an action cam. If this saturated and high-contrast style is something you like, is completely subjective. On the OA3 I’d say it looks pretty realistic too.

That being said, those saturated colors just limit the options for post-production color corrections and custom color profiles to really make the edit your own. If you like playing around creatively in an editing suite, D-Cinelike is perfect for you as it provides more freedom for creative exploration.

If editing is not in your future, leave the colors on “Normal”.

ISO: min. 100 – max. 1600

ISO is the maximum light sensitivity of the camera, and the Osmo Action 3 lets you define a range it can work with up to a staggering 12.800! Even with a wider range over the Action 2, you don’t want to give it more than it really needs as more ISO means a more grainy image.

This is why I normally set the ISO as low as possible. But stabilization needs crisp, unblurred frames. That’s done by a fast shutter speed. When it gets below 1/120 or 1/60, the image gets blurry.

High ISO can bake the image brighter without slowing the shutter, but it produces noise (grain). So, it’s a compromise.

Luckily, since a firmware update, you can set a minimum shutter! For MTB videos 1/120 is good for helmet cam, 1/240 for chest mounts. With these limits in place, you’ll always have stabilized video and can reduce the max ISO. Win-win!

This track leads in and out of the forest a couple of times. Notice how the image gets grainy, but still stable when it gets dark.

I’d personally rather have a stable, grainy video than the other way around.

Video compression: HEVC

This is just the video codec, without any impact on the bitrate. Currently, there is no option to select a specific bitrate (maximum is 130mbit/s).

HEVC or High-Efficiency Video Codec H.265 can create smaller file sizes than the H.264 MP4 codec. So this will not actually increase the bit rate, but decrease the file size while keeping the same bit rate.

The actual bit rate depends on the resolution, frame rate and video codec. Older computers may only be able to read H.264 files.

10-Bit Colors: On

The Action 3 finally got the functionality to record 10-bit colors with a firmware update in December 2022. It and the GoPro Hero 11 are currently the only action cams capable of this.

In some filming modes, it’s not available, like high FPS or certain recording modes. But there’s certainly a benefit to having it on the rest of the time.


Bonus tips and tricks
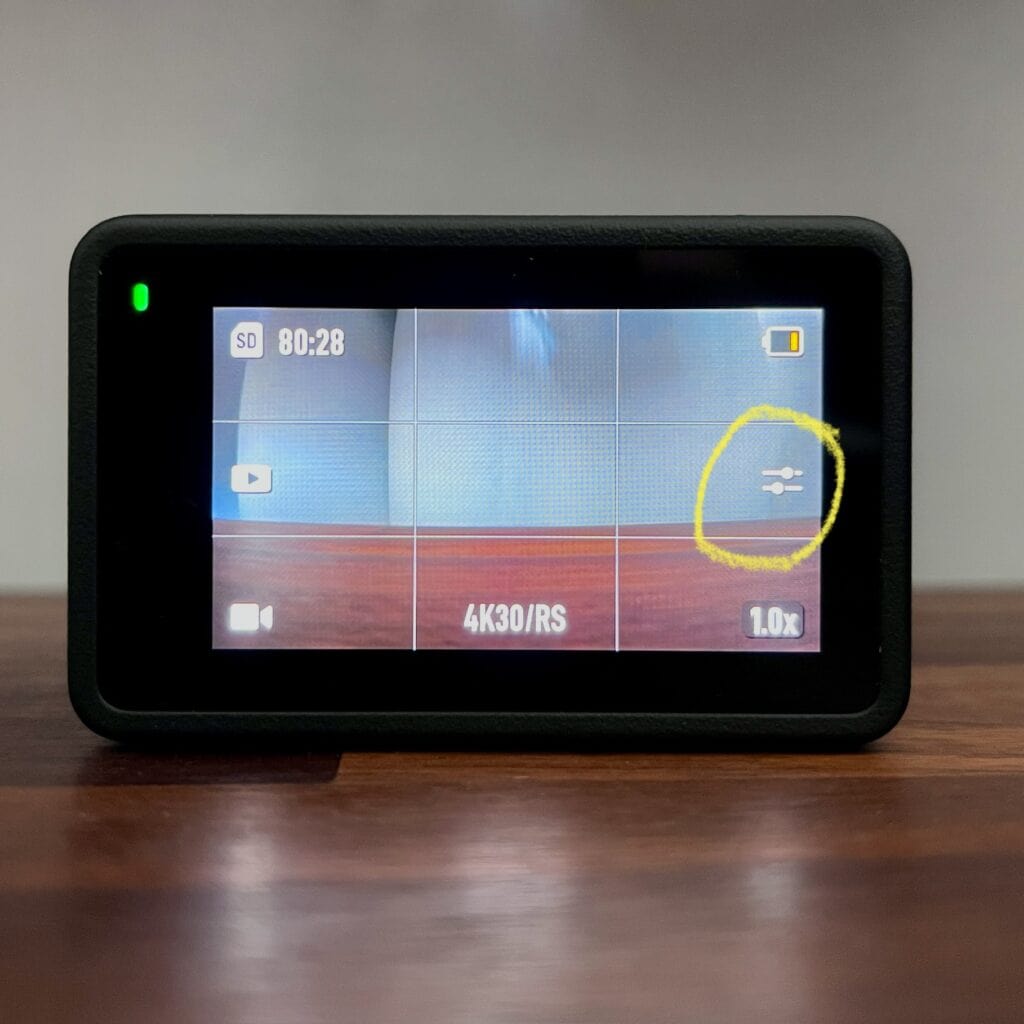
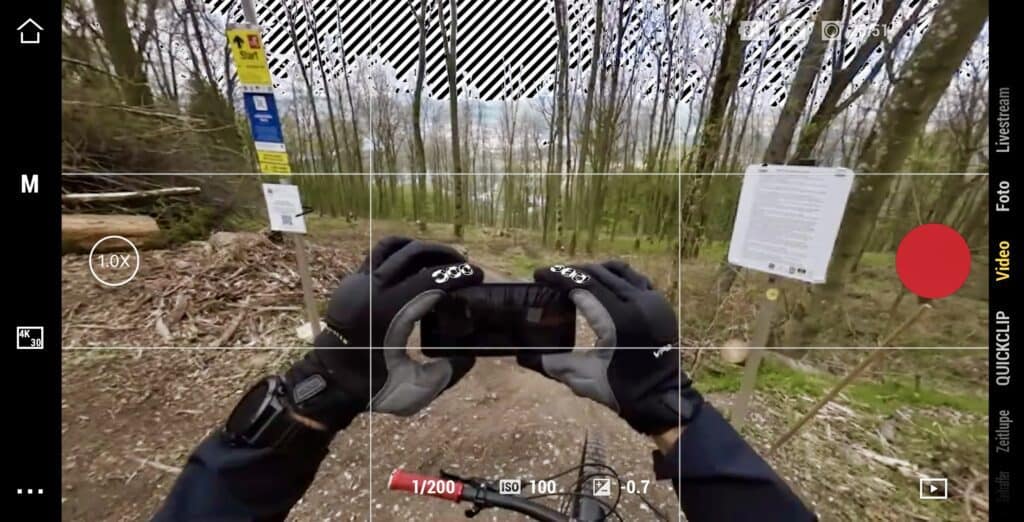
3×3 grid

Don’t be sleeping on this one! This underrated overlay is perfect not only to align the adhesive mounts on a helmet but also to find the perfect camera angle that captures the trail not just your front wheel. Find the picture below for how this looks on-screen.

Ideally, the trail and horizon should meet somewhere near the center. With the handlebars in the lower third, it makes the footage enjoyable and inviting to watch as the viewer can look ahead on the trail and also get a feel of how the bike’s handling.

Overexposure warning

This helps with optimizing the parameters of your manual settings. Overexposed areas are marked by zebra stripes.

There is no way to save overexposed footage (as I showed you above), but slightly underexposed one by brightening it up in editing software. The white, detail-less overexposed areas will stay detail-less. Darker details can be brought forward.

DJI Action 2 Mimo App
Using the DJI Mimo App to take a screenshot of the live view feature.

Screen off when recording

This should be as soon as possible on a mountain bike. While riding you’ll never even see the screen. So there is no use in leaving the screen on and wasting battery charge. Turn this option on for increased battery life.

DSC05195 1
The switch to vertical mode is extremely easy.

Orientation lock: off

This auto-detect works so well that there is no reason to turn it off. Also recommended for easy swapping between helmet and chest mount where the cam is upside down.

Fullscreen: off

This has nothing to do with the recording format, only what’s displayed on the touch-screen finder. Both a 4:3 and 16:9 format will get cropped to fit “fullscreen” on the square screen.

Leave it off to be able to see the actual frame you’re actually recording including the peripheral space on either side, where you can look forward into corners or see the rider’s arms and handlebars. Those sections of the frame are crucial for MTB.

Snapshot: On for Video

Don’t let yourself get held back by waiting for the camera to record. One-press-record is extremely helpful for capturing snapshot moments.

It also helps for knowing if the camera is recording or not. It’s either on and recording, or off. Either way, Snapshot can be overruled by using the on/off button on the side like normal.


Best camera positions for MTB

Any sport where you can’t use the camera handheld relies on the quality of mounting options for interesting perspectives. In fact, the mounting is what I love most about the latest DJI Action cameras.

Read about the first one with magnetic mounts, the DJI Action 2, in the full in-depth review here.

The magnets and hooks are what’s keeping the camera in place. It’s an extremely easy and comfortable way to mount, take off, and re-mount exactly the same way.

DSC05192
The silent game changers: The Action 3’s bottom magnets.

Helmet mounts: easy to use and set up, but can get unrelatable for the viewer

For helmet mounting, I went with the official DJI adhesive mounting kit, but after using it I honestly can’t recommend it due to the (IMO too wide) circular surface area of the flat adhesive and the overall height of this system.

Just get the GoPro mounts for the same price as they are low enough to actually fit well below the visor without obstructing your view. The DJI mounts are still way easier to attach by twisting compared to pinching and sliding.

So there’s that. With magnetic mounts, you won’t have to do that often anyway.

Helmet perspectives are also known for the “GoPro effect” that makes any steep rough trail seem harmless and flat. That’s because there are very few points of reference for the viewer who only has visual and acoustic cues.

Depth perception and lean angle get lost. An ultra-wide-angle lens like the 155° field of view of the Osmo Action 3 helps with that issue.

DJI Action 2 helmet mounted
DJI Action 2 top helmet mount.
DJI Action 2 helmet visor mounted

Chest mount: immersive, relatable, but can be cumbersome to wear

In the past, chest-mounted cameras were pretty horrid to watch without image stabilization. With this camera’s Rocksteady 3.0, it’s become a joy to film and watch. With horizon leveling, even gimbals have become obsolete. It’s the only perspective that can capture hands, handlebar, front tire, lean angle and the trail ahead.

GoPro Chesty chest mount
The GoPro Chesty 2.0 chest mount works well for DJI Osmo Action 3.

Personally, I have been using the GoPro “Chesty” chest mount since the first GoPro Hero HD for one of the most immersive views on a bike. The new V2.0 has some quality-of-life improvements and is comfortable to wear with the padding.

It comes with one standard GoPro quick-release adapter. The DJI quick-release adapters won’t fit in GoPro’s slider system, but the magnetic mount adapter will.

In fact, with the Osmo Action 3, DJI also brought its own chest mount to market (check it out here). However, it’s not the best solution as it’s using the standard design used by third-party brands. Those differ in the way they have to be put on.

Only the GoPro Chesty is built like a vest and can be worn while not closed. This is a relief since you need to tighten it pretty well to eliminate movement in the rig itself wherever you can. And not having buckles on your ribs helps with that too.

Generally, it’s hit-and-miss with third-party mounts. My personal take is that I don’t feel comfortable buying an expensive camera and relying on cheap mounting options for it to not fall off and wreck. So I tend to go with original parts from DJI or GoPro.

Also, accessories often outlast the camera itself and don’t get obsolete as quick – or never when you look at how action cams have been mounted for the last decade using the two famous GoPro “fingers” since the Hero 1.

Similar Posts

2 Comments

  1. Thanks for the great article, I’ll use your settings for my next ride. One thing I’m not sure about: When you talk about RockSteady 3.0 do you mean the normal RockSteady or the RockSteady+ option?

Leave a Reply

Your email address will not be published. Required fields are marked *